Sunday, April 24, 2005
mmm... dimmers....
living02
Originally uploaded by Michael Browne.
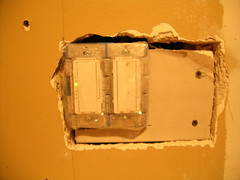
The hard part about this job was taking the existing wall switch and changing it to 2 swtiches. The previous switch didn't control anything; at least that I could tell.
note the nice little LEDs (light emitting diodes) that indicate how bright the dimmer is. Swanky. The switch on the right doesn't have LEDs because it's the remote dimmer for the other switch; it's partner has LEDs on the other side of the room.
Notice the drywall screws to the left of the switch. That's holding a 2x4 in place, that's acting as the support for the switch box. Otherwise, there wouldn't have been a way to mount the switch.
Joint compound to come later.
Living, now
living01
Originally uploaded by Michael Browne.
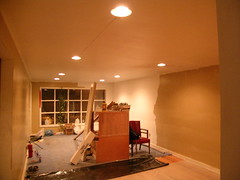
And this is the living room, now. I really wish I had time and energy to take pictures while I'm doing this stuff, but getting the project done is hard enough, let alone stopping to take pictures along the way.
So, here they are. 8 little 6" round lighting pods, wired on two separate circuits, each with two separate 3-way dimmer switches. To those who don't understand electrician-speak, that means 4 lights are on one switch, which can be controlled from either end of the room, each with a dimmer. Quite fancy, really.
The big wood box in the middle of the room is the last remaining piece of cabinetry to be refinished. Everything else sits in the garage, awaiting stain and urethane.
The living room, 5 months ago.
living00
Originally uploaded by Michael Browne.
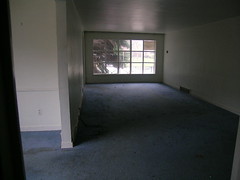
Wow. The first time I've looked at this picture in quite some time. Lots has changed since December... I've learned a lot, I've electrocuted myself a lot, I've awoken in the middle of the night thinking, "is that water I hear dripping? Is that in the office or in the attic?"
But enough about my psyche and what I know and don't know. This is a picture of the living room before I did anything to the house.
Tuesday, April 05, 2005
Hardibacker Board
kitchen14
Originally uploaded by Michael Browne.
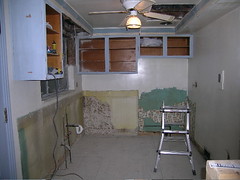
Take a close look at that floor. Thanks to Traci, the hardibacker sub-floor is installed. This stuff makes it easy to tile on top. I have some heated floors on order, and once the rest of the kitchen is finished, I'll put some thinset mortar down, lay down the heated floor coils, and then tile on top of that.
It's going to look so fly....
The Ongoing Project
If I'd have thought this way from the start, I would have taken care of all the electric first, then the plumbing, and then gotten in to painting and such... Alas, life isn't perfect, and knowing that certain things needed to happen so that I could move in, the systems approach gets thrown out the window.
So, here's a laundry list of what I'm currently working on:
*completed installation of fluorescent lighting in workshop.
*kayak on hooks along gararge wall.
*dryer needs repaired.
*recessed lighting needs wired up.
*kitchen and bath window need installed (sitting at the Home Depot warehouse right now).
*cabinets need refinished.
*back yard needs grass seed; find rhodedendron bush.
*install tile in bathroom.
*find wall heater for bathroom.
*refinish wood floors.
*repair doorbell system.
*landscape front yard turnaround; concrete over gravel.
*and of course, the rest of the kitchen remodel.
whew! and that's about a third of the entire project!
Kohler to the rescue
bath05
Originally uploaded by Michael Browne.
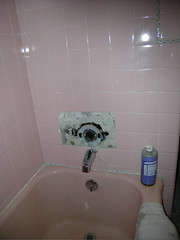
And here's the installed piece, a Kohler brand piece. I couldn't bear to put in crap fixtures, so I went with a good brand, which cost me a lot more than I thought it should.
But I upgraded to a single lever system which includes a scald-guard--something that's actually in the new building codes.
The only problem now is that I can't find pink tile to replace what I chiseled away!
Pink tile, be gone!
bath03
Originally uploaded by Michael Browne.
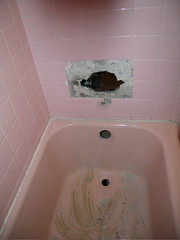
I still can't form a solid decision on whether the bathroom should remain pink (pink tub, pink tile, pink toilet). I mean, remodeling a bathroom costs a lot of money, and I'm afraid that if I go ahead with it that I'll create something that other people won't appreciate.
Anyway, I did need to replace the fixtures. The faucet leaked incessantly and it's impossible to find replacement parts. And when you do find them, they cost 10 times as much as they should.
So, here you can see how I chiseled out the tile, removed the fixtures and hacked out the pipe.
